

In this chapter, we’re going to see how to take our first steps with Docker and work with our first container. This chapter will provide you with the basics of how to interact with Docker.

In the beginning, we will check if Docker is working correctly, and then we’re going to take a look at the basic Docker workflow: creating and working with containers. We’ll take a container through its typical life-cycle from creation to a working state and then stop and remove it.
Firstly, let’s check that the Docker binary exists and is functional:
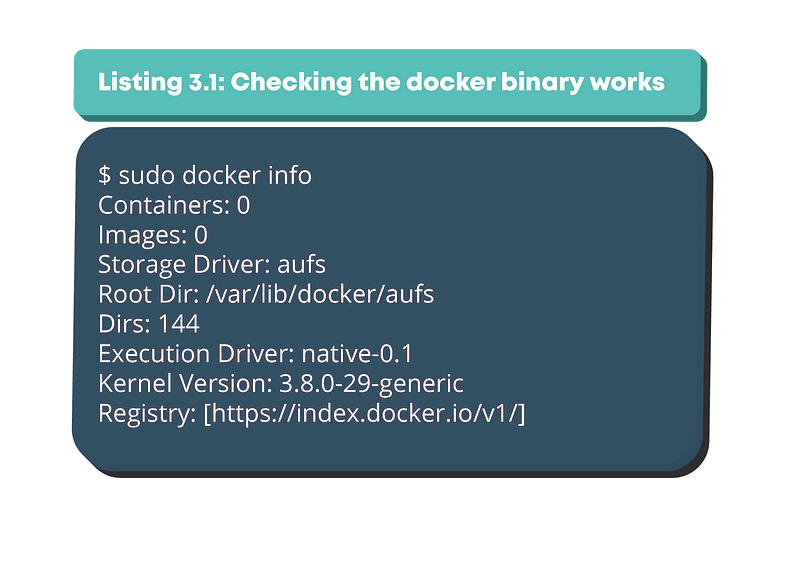
In this part, we’ve passed the info command to the Docker binary, which returns a list of any containers, any images (the building blocks Docker uses to build containers), the execution and storage drivers Docker is using, and its basic configuration.
As we’ve learnt in previous chapters, Docker has a client-server architecture. It has a single binary, docker, that can act as both a client and a server. As a client, the Docker binary passes requests to the Docker daemon (e.g., asking it to return information about itself) and then processes those requests when they are returned.
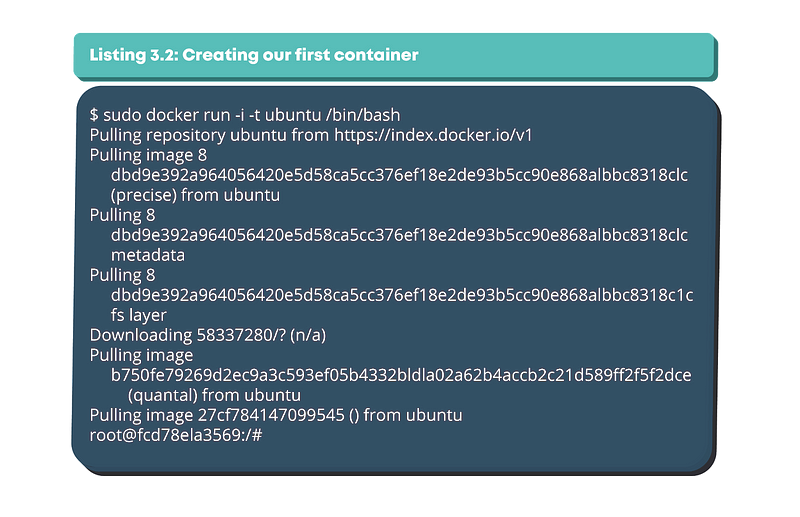
Now let’s try and run our first container with Docker. We’re going to use the docker run command to create a container. The docker run command provides all of the “launch” capabilities for Docker. It’s very useful to create new containers.
Let’s look at each piece.
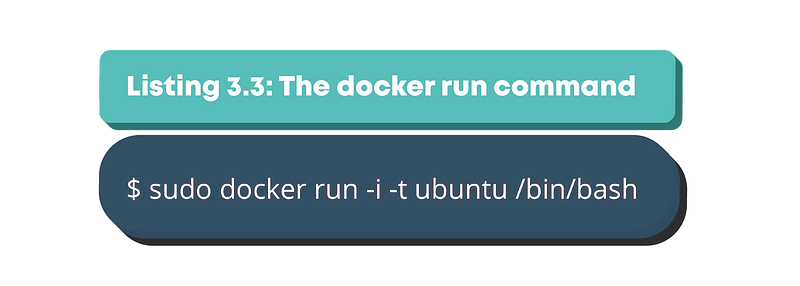
First, we told Docker to run a command using docker run. We passed it two command line flags: -i and -t. The -i flag keeps STDIN open from the container, even if we’re not attached to it.
This persistent standard input is one-half of what we need for an interactive shell. The -t flag is the other half and tells Docker to assign a pseudo-tty to the container we’re about to create. This provides us with an interactive shell in the new container.
This line is the base configuration needed to create a container with which we plan to interact on the command line rather than run as a daemonized service.
Next, we told Docker which image to use to create a container, in this case, the Ubuntu image. The Ubuntu image is a stock image, also known as a “base” image, provided by Docker, Inc., on the Docker Hub registry.
You can use base images like the Ubuntu base image (and the similar Fedora, Debian, Centos, etc., images) as the basis for building your own images on the operating system of your choice. For now, we’re just running the base image as the basis for our container and not adding anything to it.
So what was happening in the background here? Firstly, Docker checked locally for the Ubuntu image. If it can’t find the image on our local Docker host, it will reach out to the Docker Hub registry run by Docker, Inc., and look for it there. Once Docker had found the image, it downloaded the image and stored it on the local host. Docker then used this image to create a new container inside a file system. The container has a network, an IP address, and a bridge interface to talk to the local host.
Finally, we told Docker which command to run in our new container, in this case, launching a Bash shell with the /bin/bash command. When the container had been created, Docker ran the /bin/bash command inside it; the container’s shell was presented to us like so:
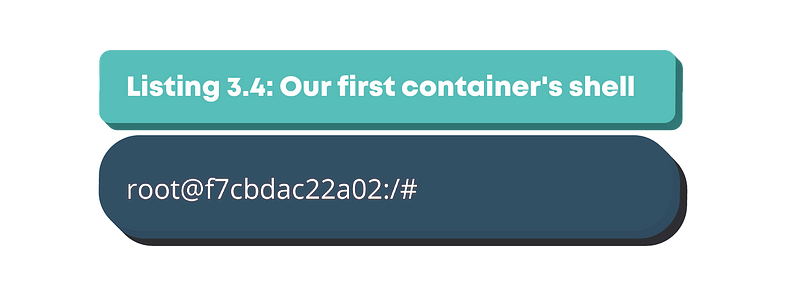
We are now logged into a new container, with the catchy ID of f7cbdac22a02 as the root user. This is a fully-fledged Ubuntu host, and we can do anything we like on it.
Let’s explore it a bit, starting with asking for its hostname. Let’s have a look at the /etc/hosts file too.
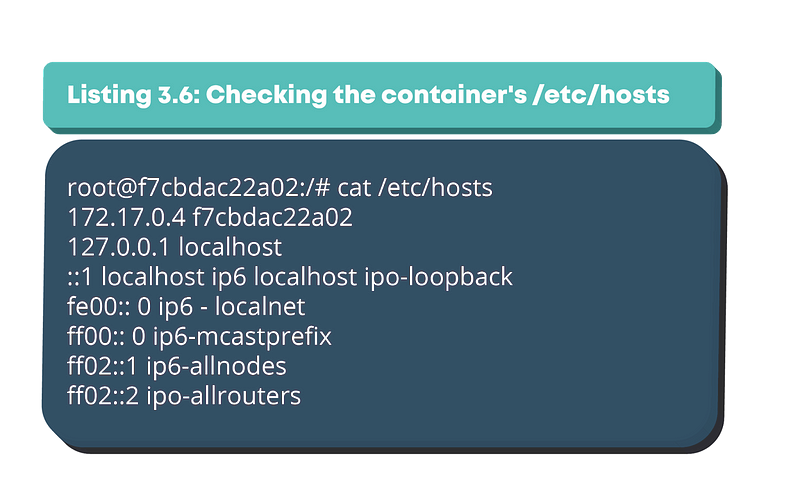
Docker has also added a host entry for our container with its IP address. Let’s also check out its networking configuration.
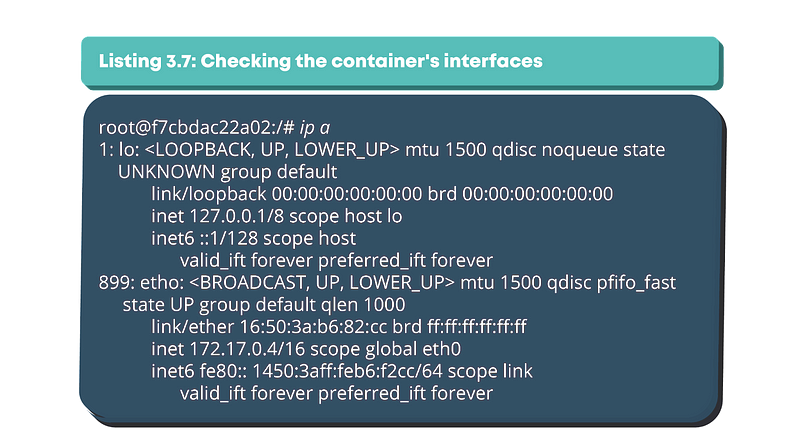
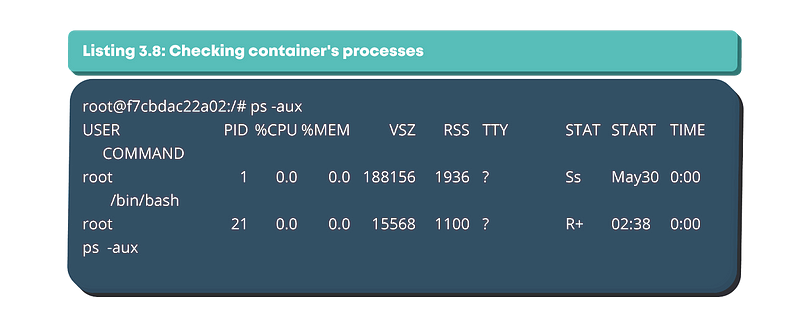
As we can see, we have the lo loopback interface and the standard eth0 network interface with an IP address of 172.17.0.4, just like any other host. We can also check its running processes.
You can keep playing with the container for as long as you like. When you’re done, type exit, and you’ll return to the command prompt of your Ubuntu host.
So what’s happened to our container? Well, it has now stopped running. The container only runs for as long as the command we specified, /bin/bash, is running. Once we exited the container, that command ended, and the container stopped. The container still exists; we can show a list of current containers using the docker ps-a command.
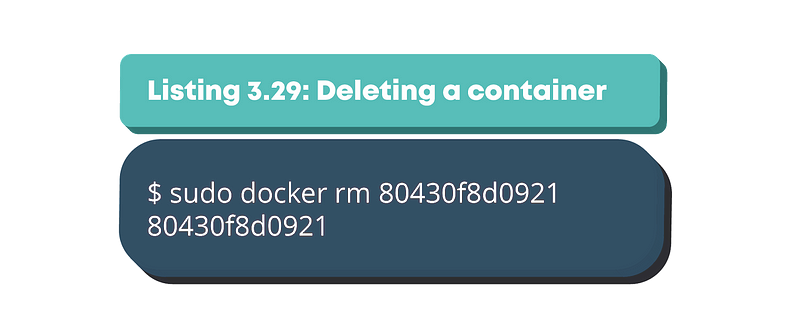
If you are finished with a container, you can delete it using the docker rm command. It’s important to note that you can’t delete a running Docker container. You must stop it first using the docker stop command or docker kill command.
There isn’t currently a way to delete all containers, but you can slightly cheat with a command like the following:
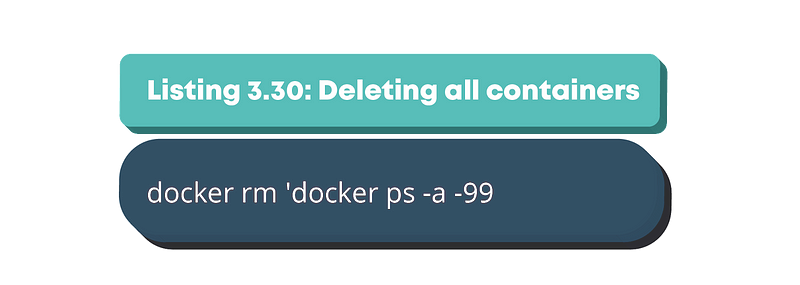
This command will list all of the current containers using the docker ps command. The -a flag lists all containers, and the -q flag only returns the container IDs rather than the rest of the information about your containers. This list is then passed to the docker rm command, which deletes each container.
We’ve now introduced the basic mechanics of how Docker containers work. This part is the second to last in the line of our Docker blogposts, with the next one focusing largely on practical examples which will bring you even closer to understanding Docker. What it is about? You will find out soon.