To wrap up our series of Docker blogs, we will focus on Dockerization and provide a useful tutorial using our example to guide you in Dockerizing more complex applications.
So, what does Dockerization mean?
Dockerization refers to the process of packing, deploying, and running applications using Docker containers. In simple terms, it allows you to bundle your software and all its dependencies into a self-contained package that can run without a complicated setup. Docker is fast, enabling you to Dockerize your application in just a few minutes.
Example of Dockerizing Node.js app
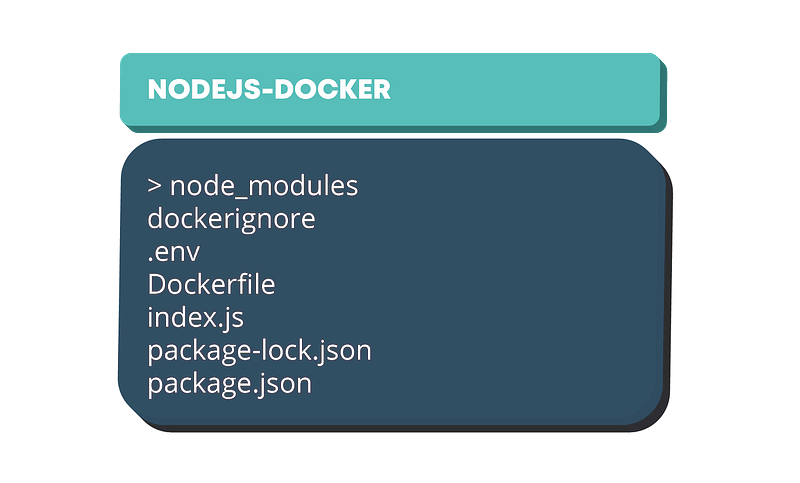
Before we begin, review the commands for dockerizing the application. You can find them here. Now, let’s look at the structure of our application—a simple Node.js app with a single endpoint to start the server.
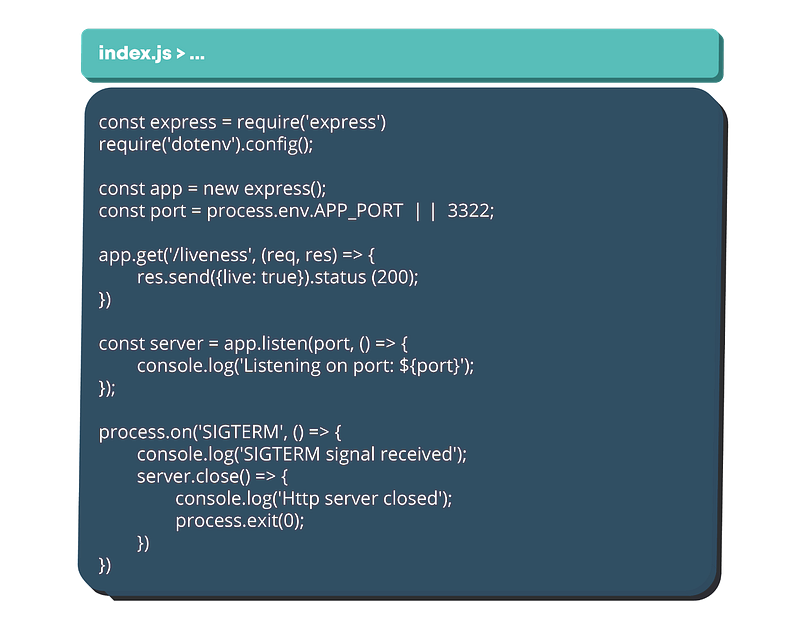
Next, let’s check the content of the index.js file, where we implement the HTTP server. The app’s port is set using an environment variable or defaults to 3322.
We have one endpoint, liveness, which can be used by a Docker orchestration tool to check the service status. The operating system sends events to the Node.js process based on external circumstances, allowing the app to terminate gracefully.
Example
For example, the app stops accepting new connections, ends persistent ones, completes outstanding requests, closes files and database connections, and exits.
In our setup, we handle the SIGTERM signal by stopping the server from accepting new requests and gracefully shutting down the app.
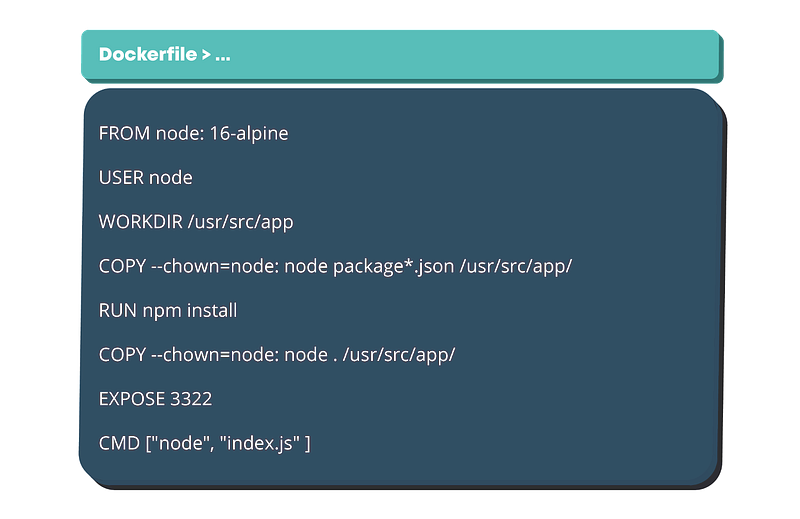
Let’s dive into the key file of this article: the Dockerfile. The FROM command defines the base image from which we will build our custom image. Here are some best practices for the base image:
Always specify the version of the base image.
Use -alpine versions to keep your image size small.
For security reasons, avoid running your container as root. Official Node images and all -alpine versions come with the least privileged user, node, which we can use. To fully support the build process, using node alone isn’t enough—it ensures the process is owned by the user, but we also need to set permissions on all copied files.
The EXPOSE instruction makes the specified port available only for inter-container communication, not for access from the host machine. To allow host access, we need to map the container port to the host machine’s port.
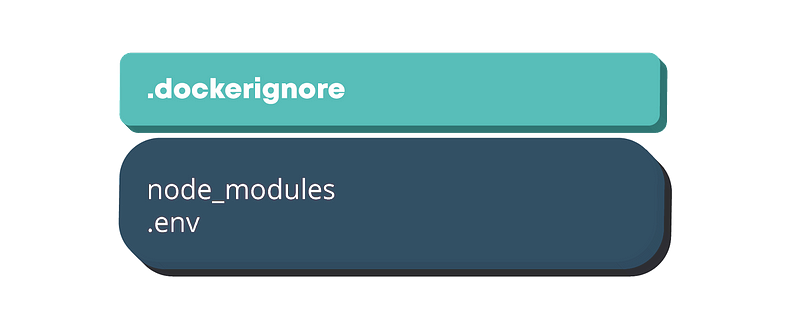
In order to skip some files being dockerized for security reasons or any other we need to set up .dockerignore and specify which files or folders should be skipped, so in our example node_modules will not be needed since npm install is defined in Dockerfile and we will pass our environment variable in the run command.
With all things set up, we can start building our first image. Run the next command at the root of the project. The image is now built and stored in our local image repository.
docker build. -t waltercode/docker-nodejs:v01
To run our docker image on a local machine.
Docker run -p 3322:3322 waltercode/docker-nodejs:v01
After it’s started using the command docker ps in the terminal we should see our docker container.
If we want to make our image available for public usage we can push the build image to one of the Docker repositories (the most popular DockerHub).
docker push waltercode/docker-nodejs:v01.
Conclusion
In this module, we set up an example Node application to help you continue learning Docker. This example demonstrates how to Dockerize a Node.js application. We also created a Dockerfile to build our image.
After reading this article, you should have enough knowledge to Dockerize your own applications, so even if they use other technologies. This concludes our Docker series, and we hope you found it valuable.
We cover interesting IT topics regularly, so follow our social media for the latest updates!